Oct 16, 2026Buying Guides
7 Things to Check on a Packaging Dieline Before Production
Review these 7 packaging dieline details before production, including dimensions, fold lines, glue areas, bleed, artwork placement, and box structure.
7 Things to Check on a Packaging Dieline Before Production
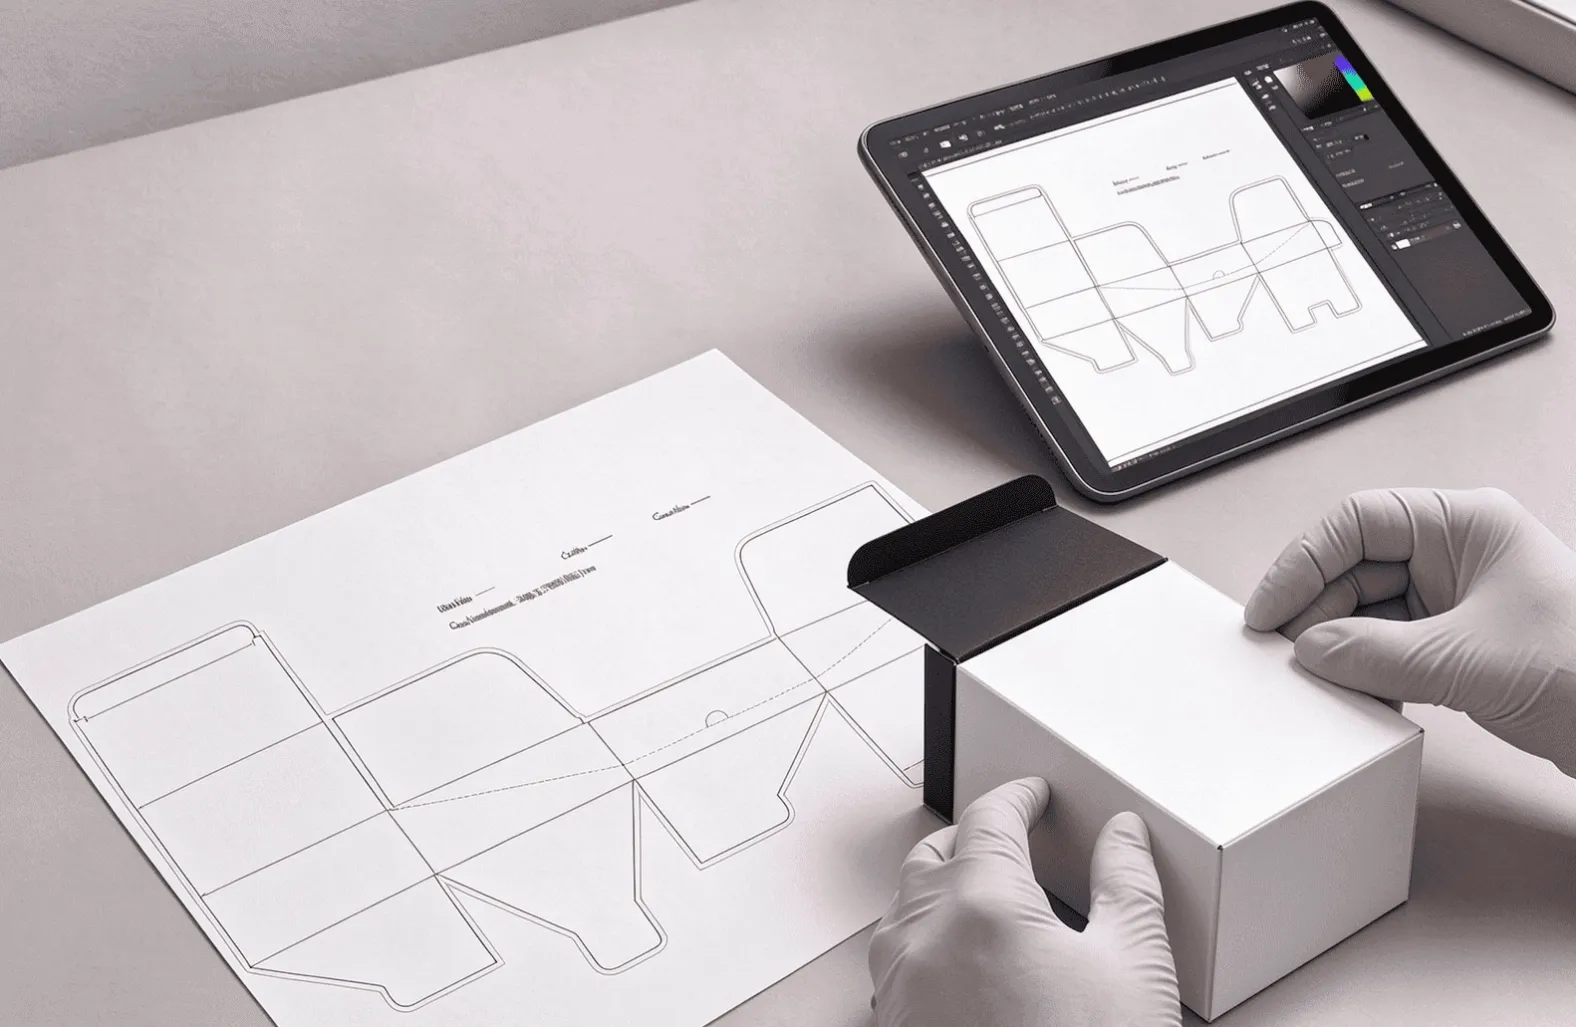
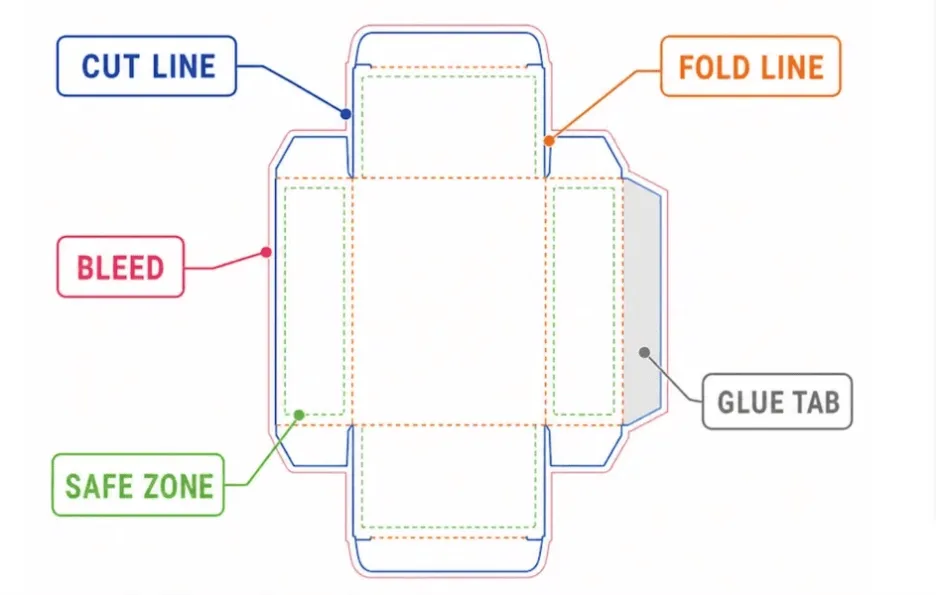
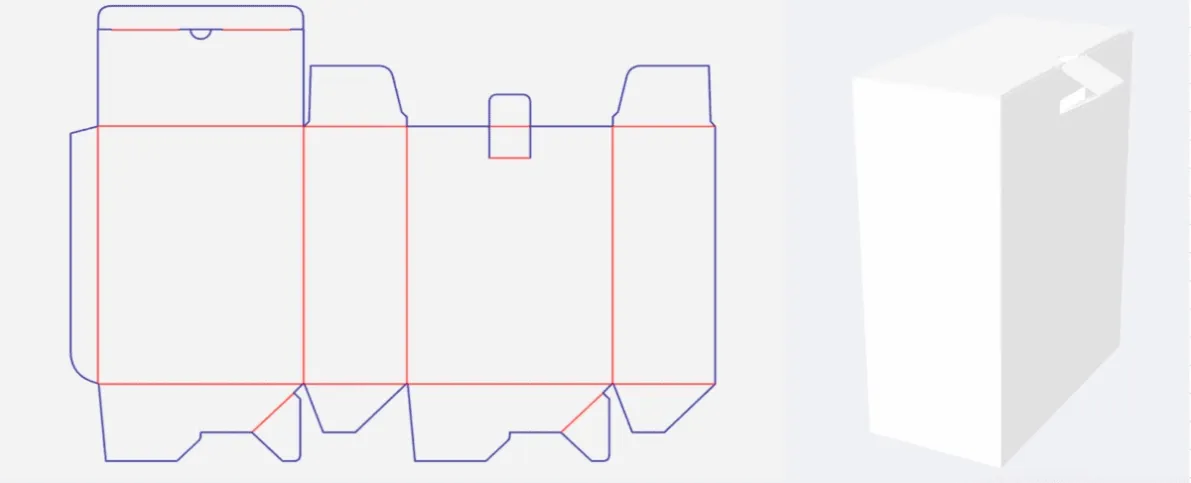
A packaging dieline is the flat template that guides cutting, folding, and assembly of a custom box — think of it as the blueprint for your packaging. It defines the box structure and shows exactly where printed artwork will sit. In plain terms: dieline is the plan, cut lines tell the machine where to trim, fold lines show where the board bends, glue areas hold it together, bleed is the extra artwork that runs past the cut edge, and the safe area keeps important text and logos away from vulnerable edges.Even a well-designed package can fail if its dieline is wrong or the artwork is prepared incorrectly. Bad dimensions, misplaced graphics, missing bleed, or an unsuitable glue area lead to production delays, wasted material, and boxes that simply don't assemble.Review these seven details before approving your packaging artwork.
- Confirm the Box Dimensions and Measurement Units
Verify the dieline matches the required length, width, and height — and clarify whether these are internal or external measurements of the assembled box. Internal dimensions decide how the product fits; external dimensions affect storage, master-carton planning, and shipping.Confirm the measurement units too. Millimeters and inches should never be mixed or misread between teams. For products with an insert, check the box and insert together — a box at nominal size may still be unsuitable if the insert eats the space or blocks loading. A good review confirms: length/width/height; internal vs. external; units; product + insert compatibility; and clearance for easy loading. Red flag: a dieline that only quotes one set of numbers with no unit or fit context. Practical tip: if you have a physical sample, compare its measured dimensions with the spec rather than trusting the flat template by eye.
- Understand the Cut Lines, Fold Lines, and Crease Lines
A dieline uses different line types for different operations: cut lines define where material is trimmed, fold/crease lines show where the board bends during assembly, and other marks identify perforations, slots, or special features. Line colors and conventions vary by supplier and design workflow — always confirm what each line means in the supplied template.
Check that: cut lines don't cross important artwork; fold lines align with the intended panels; slots and locking tabs match the structure; crease positions allow clean folding.
Important: never move or delete structural lines just to make artwork easier to lay out — any change alters how the box is cut, folded, glued, or locked. If you must adjust structure, ask the supplier to confirm the revised template first.
- Check the Bleed, Safe Area, and Artwork Alignment
- Bleed is the extra artwork extending beyond the final cut edge, preventing thin white gaps if the sheet shifts during cutting. Confirm the required amount with your supplier.
- Safe area is the inner zone where important text, logos, barcodes, and small details stay clear of trimming and creasing.
- Artwork alignment means graphics sit correctly on each panel once the box is folded.
Pay special attention to artwork that crosses panel boundaries — a logo that looks centered on the flat dieline can appear off-center on the assembled box if the fold orientation is misunderstood. Inspect full-bleed edges for unintended white gaps.
- Verify the Glue Flaps, Overlaps, and Closure Structure
Glue areas are functional parts of the structure, not empty space. A glue flap that's too narrow, misplaced, or covered with wrong artwork can make a box hard to assemble or insecure.For folding cartons and sleeves, check glue flap width, panel overlaps, and assembly direction. For rigid boxes and complex structures, confirm wrapping, joining, and closure requirements with the supplier. Review the closure mechanism — tuck flaps, locking tabs, magnetic closures, hinged lids — and make sure these weren't altered during artwork prep.
Red flag: a template that looks visually balanced but hasn't been checked for structural reliability. Ask the supplier to confirm the approved dieline matches the intended assembly method and closure performance.
Real-World Example: Why a Self-Locking Bottom Needs More Than the Right Size
In one small folding carton project, the customer reported the bottom could open after the product was inserted and the box was shaken. The issue wasn't whether the carton could be assembled — it was whether the bottom stayed secure during normal handling.Reviewing the earlier design, we found it lacked the 7-shaped locking cut added in a later structural revision, which affected how the bottom flaps engaged. The lesson: a dieline can have the correct overall dimensions and still need further structural evaluation. Locking tabs, slots, crease positions, and flap geometry all work together — their performance depends on the board spec and the package's intended use. For similar projects, ask your supplier to review the bottom-locking mechanism and test a physical sample with the actual product before mass production.
Want us to review your dieline? Send us your dieline, artwork, product dimensions and packaging type. We’ll check everything for free before you go into production. Contact Cherubox →
- Check the Artwork Orientation and Panel Sequence
Multiple panels can look alike when flat. Wrong placement or rotation means finished boxes display graphics upside down or in an unexpected spot. Check the orientation of front/back panels, side panels, top/bottom panels, inside/outside surfaces, and glue flaps.For printed interiors, make sure inside artwork is positioned correctly relative to the exterior. For sleeves, confirm the panel sequence and how artwork wraps around the product. For multipanel cartons, judge the assembled orientation, not the flat layout.Best practice: ask for a 3D mockup or a folded paper prototype to review the panel sequence before approving. Remember a 3D rendering helps visualize but does not replace verifying the actual dieline and production specs.
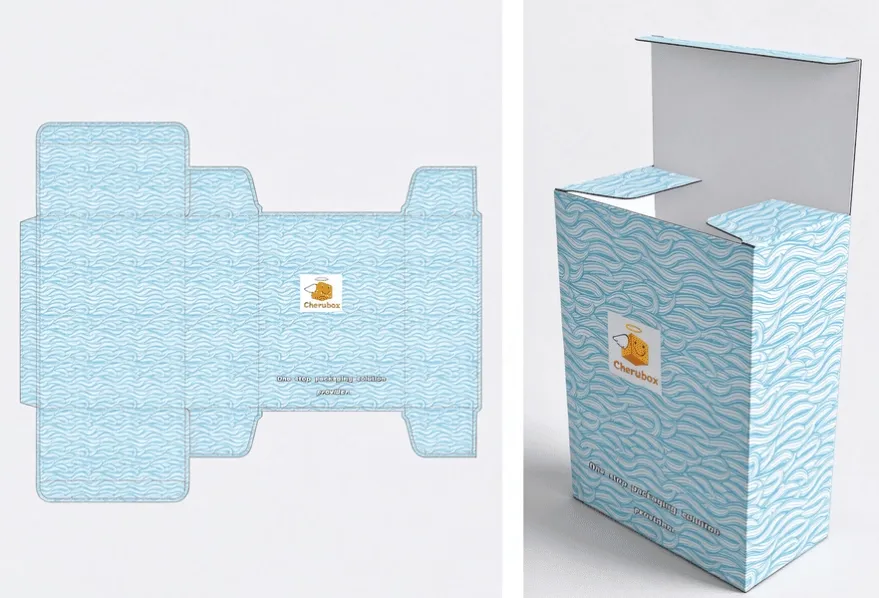
- Confirm the Printing and Special Finishing Layers
Artwork may include more than a standard CMYK layer: Pantone colors, foil stamping, embossing, debossing, spot UV, and other finishing instructions. These must be clearly identified and correctly positioned. Confirm: the correct artwork version and color references; intended printing surfaces; the position of foil/UV/emboss; that finishes align with printed artwork; and any supplier-specific requirements for separate production layers. For example, a spot UV layer may need to be a defined spot-color separation, and foil stamping may need its own layer marking exact stamp areas. Don't assume a screen color equals the final print or metallic finish — confirm production specs and proofing with your supplier. See our guides on Pantone Printing for Packaging: What Buyers Need to Know and Packaging Finishes: A Complete Guide to Foil, Embossing, UV and Lamination.
- Review the Final Dieline Version Before Giving Approval
One of the most avoidable problems is using different versions of the dieline or artwork during approval and production. A revised box size changes panel dimensions, fold positions, glue flaps, or layout — if artwork isn't updated to match, the box won't assemble or display correctly.Confirm: the dieline version matches the approved structure; artwork is updated to the latest template; fonts/images/links are embedded; print and finishing instructions are clear; and the final proof matches production specs. If a change happens after approval, ask whether it affects dieline, artwork, tooling, or schedule. Don't trust filenames — a file called "final" may not be the latest. Use clear revision dates or version numbers.
Final Checklist Before Approving a Packaging Dieline
Review the dieline as both a technical template and a production document. Correct artwork matters, but the box must also fit the product, fold correctly, close securely, and support the intended print and finishing.
Check | Passes when |
1. Dimensions | Length/width/height confirmed; internal vs. external clear; units consistent; insert fits |
2. Lines | Cut/fold/crease lines understood; no structure lines altered for artwork |
3. Bleed & safe area | Bleed meets spec; text/logos inside safe area; full-bleed edges clean |
4. Glue & closure | Glue flap sized/placed correctly; locking tabs & slots work together |
5. Orientation | Every panel oriented correctly; 3D/folded prototype reviewed |
6. Print & finishes | Color refs correct; foil/UV/emboss layers defined and aligned |
7. Version control | Artwork matches latest dieline; fonts embedded; proof agrees with specs |
If you're not a packaging engineer, ask your supplier to review the structural details before approval. The purpose isn't to make buyers responsible for every technical detail — it's to ensure buyer and supplier work from the same approved specifications.
Frequently Asked Questions
What is a packaging dieline? A dieline is the flat template that guides cutting, folding, and assembly of a box. It defines the structure and shows where printed artwork sits.
What should I check on a dieline before production? Check dimensions and units, cut/fold/crease lines, bleed and safe area, glue flaps and closure, artwork orientation, print and finishing layers, and that you're using the final version.
What is bleed on a packaging dieline? Bleed is extra artwork that extends beyond the final cut edge, preventing white gaps if the sheet shifts during cutting. The required amount depends on the supplier's specs.
What is a safe area on a dieline?
The safe area is the inner zone where text, logos, barcodes, and small details stay clear of trimming and creasing.
Can I use a 3D rendering instead of checking the dieline?
No. A 3D rendering helps you visualize the design but does not replace verifying the actual dieline, dimensions, and production specifications.
Who should review the dieline?
The supplier should verify structural details, especially for complex boxes. The buyer should confirm specs match the approved design and intended use.
Need Help Reviewing Your Packaging Dieline?
At Cherubox, we help brands and wholesale buyers coordinate packaging structures, artwork, materials, printing, finishing, and production requirements — backed by low MOQs and a US + China design team that delivers die-cut templates within one working day. Send us your dieline, artwork, product dimensions, and intended packaging style, and we'll flag the questions to clarify before mass production. See also our companion guide on the 8 Questions to Ask a Custom Packaging Supplier. Discuss Your Packaging Project with Cherubox → Email: sales@cherubox.com